Invitations
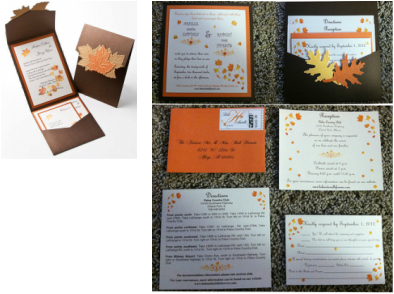
The picture on the left was the inspiration for these. We designed the graphics and had them printed at Office Max. The paper is from Archivers. We cut and assembled them using QuickDry Paper glue.
The shoes!
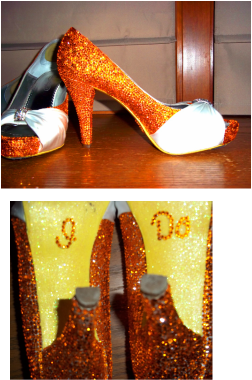
Strassing the shoes was probably the second biggest project we took on and we procrastenated for quite a while before we started. Amazingly it is pretty easy to do, just really time consuming! I want to thank Ashly and her DIY Tales Blog ( http://diytales.wordpress.com/2012/03/04/how-to-strass-your-shoes/ )for wonderful advice and instruction - Ashley - you ROCK!
The only thing I have to add as far as strassing goes is that there are these wonderful little tools called Jewel Setters. It's like a ball of wax on the end of a stick - this tool made this sooo much easier! We used 16ss, 12ss, 9ss and 7ss. We used about 4200 Swavorski Flatback Rhinestones.
We painted the bottoms of the shoes with glitter paint and added "I Do" with the the 9ss stones.
Card Box, Guestbook, pen and ring box.
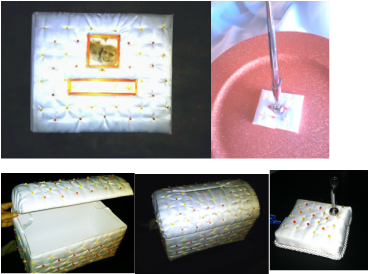
Very soon after B&A got engaged the three of us went shopping. We stopped at a local store that makes wonderful handmade wedding items. There was a really cool set - a card box & ring bearer box. B&A fell in love with it - and then they looked at the price - yikes! Bob looked at me with these puppy dog eyes and said "You could make that, right?" and I, basking in their happiness, said "Sure! I can do that"...I must have been out of my mind!
We headed to Joann's and next thing I knew we had yards of glitter satin, tons of swavorski crystals, thread etc. - Arielle and I made a lot of things for their new home, curtains, pillows, wall hangings - but this project quickly escalated into the biggest thing we had ever attempted. And grew to include a guestbook and pen. All pintucked with crystals! (sigh) Seven months later (OK there was a little procrastination involved!) here are the card box and guestbook.
The card box started out as a simpe card box from Michael's (40% coupon, yay!) We cut satin in the shape that the box would have when it was disassembled. Then we glued batting on the inside to fit the top and sides only and pintucked and attached the Swavorski crystals in a grid pattern. Then we wrapped the box and glued the satin down. I just gathered the satin on the sides of the lid and folded them to the inside. We lined the inside with sparkly card stock to cover the ends of the satin. I wish I had better instructions to share but this was so trial and error that I can't even remember the steps:) Ring box and pen to come soon!
We completed the pen - I'm not really happy with it and we may redo it but there are many more projects to do so we will see...
We ended up redoing the pen so that it better matched the card box and guestbook!
Bridesmaid Hangers
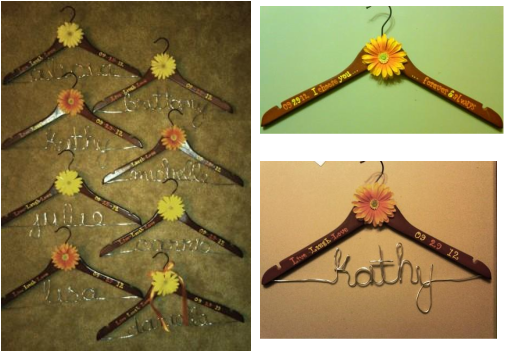
We made these for the Maids, MOB, MOG, Step MOG, and bride. Arielle's is shown without the name - we didn't want to put her last name out there, on the advice of multiple Knotties - thanks ladies!
The MOH has a ribbon added and of course the Bride's is different! We actually used the drill to make an indentation for the flowers to sit in and used E6000 glue (amazing stuff but messy!) to attach them. I can't wait to see the pictures with alll the dresses on the hangers - I think it's going to look SO cool.
We want to thank all of the knotties that shared insight on how to do this and rrpalacios2011 who has some great how-tos on you tube!
Tear of Joy
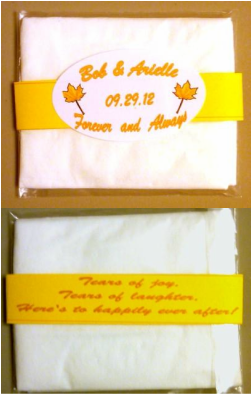
I know people have really strong opinions about these - but we are a weepy type family so we made them anyway! The band is made out of card stock and the emblem is a sticker. We thought about ribbon for the band but the card stock gave the packets a little more substance. We just folded the tissues and placed them in the bags, folded the card stock band and fastened it with the stickers! Super easy and cute!
I love that we got paid to make these - we had rewards certificates from Staples for the card stock and got a rebate on the stickers that even covered the cost of the tissue and the bags we got from Michael's!
I love that we got paid to make these - we had rewards certificates from Staples for the card stock and got a rebate on the stickers that even covered the cost of the tissue and the bags we got from Michael's!
Monogram
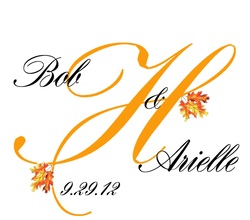
Well, the monogram is done now on to the items that it needs to go on! I love the way it turned out. We made this iin plain old Publisher.
First we found a font the B&A liked and just typed an "H" increasing the font size until it filled the page. We saved it as a picture and inserted it into a new Publisher document. Next, we added text boxes with the names, "&" and date (each in a seperate text box. We moved the "H" to the back, added the leaf graphics and TA-DA it was done. Super easy! Once you have it finished I highly recommend changing it or having it changed to a vector image. When I got this enlarged to do the aisle runner it pixelated pretty badly.
First we found a font the B&A liked and just typed an "H" increasing the font size until it filled the page. We saved it as a picture and inserted it into a new Publisher document. Next, we added text boxes with the names, "&" and date (each in a seperate text box. We moved the "H" to the back, added the leaf graphics and TA-DA it was done. Super easy! Once you have it finished I highly recommend changing it or having it changed to a vector image. When I got this enlarged to do the aisle runner it pixelated pretty badly.
Aisle Runner
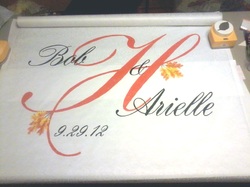
A million thanks to Heather for the instructions in her "Road to the Aisle" Blog ( http://roadtotheaisle.blogspot.com/2007/07/diy-aisle-runner.html ) there is no way we could have done this without her! The only hints I have are to make sure you check the material your runner is made of before you buy - the one we got from Michael's was fuzzy and that made it really hard to trace the design. Also, watch the paint. We bought Martha Stewart any surface acrylics. We bought the glitter type and the paint bleeds and spreads. We had to paint with the satin finish paint first and then go over it with the glitter paint, staying away from the edges.
Also. after reading some of the comments on The Road to Aisle and speaking to the photog we unrolled the runner really far to make sure the monogram would be visible in the pictures of the ceremony.
Also. after reading some of the comments on The Road to Aisle and speaking to the photog we unrolled the runner really far to make sure the monogram would be visible in the pictures of the ceremony.
Ribbon Wands

We found a lot of different ideas on how to make these but we wanted to keep them simple - and cheap! :). We found ribbon on sale at Michael's and we chose ribbons in the wedding colors as well as sparkly silver and white. I have also seen these done using different sewing trims but we couldn't find any we really liked. We got the dowel rods at Home Depot (way cheaper than the craft stores). They came 4ft long but Bob just cut them in thirds with his trusty circular saw! We sanded the ends a little to make them smooth. Each rod is 16" long.
Bob and Arielle cut the ribbons 12" long and glued 1/2" of the ribbon to the rod so that they extended out from the end of the rod (pretty much the way they are positioned in the bottom picture!), using hot glue. To cover the raw edges of the ribbon and to attach the bells they used 12" pipe cleaners, cut in half. Then they threaded the bell on and wrapped it around at the top to cover the ribbon ends. The pipe cleaner is hot glued down as well. The only changes I would make to what we did would be to use the sparkly pipe cleaners and possibly paint or stain the wooden rods.
Bob and Arielle cut the ribbons 12" long and glued 1/2" of the ribbon to the rod so that they extended out from the end of the rod (pretty much the way they are positioned in the bottom picture!), using hot glue. To cover the raw edges of the ribbon and to attach the bells they used 12" pipe cleaners, cut in half. Then they threaded the bell on and wrapped it around at the top to cover the ribbon ends. The pipe cleaner is hot glued down as well. The only changes I would make to what we did would be to use the sparkly pipe cleaners and possibly paint or stain the wooden rods.
Centerpieces
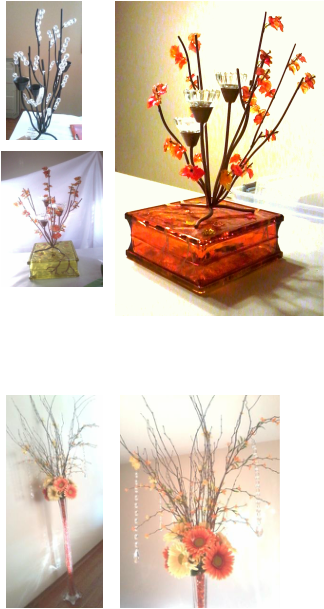
Bob and Arielle got these from another bride on Craigslist but they were not quite what they wanted. So they painted them, took off the plain crystals and added orange and yellow leaf shaped crystals. Danille and Arielle spent hours and ended up with really sore fingers but the result was worth it!
Once we thought about how small these would look on a table that seats 8-10 people, we started looking for a way to elevate them. We got glass blocks and painted them with Krylon Stained Glass spray paint. We are having holes drilled in the bottom and the glass block will be illuminated for a nice soft glow. These will go on half of the tables at the reception.
Since we decided to go with yellow table runners we painted the glass blocks orange instead of yellow. This is the final result.
These are the tall centerpieces that will go on the other half of the tables. There will be some fall leaves added under the gerber daisies and a few more flowers to fill it out.
BM Flip Flops
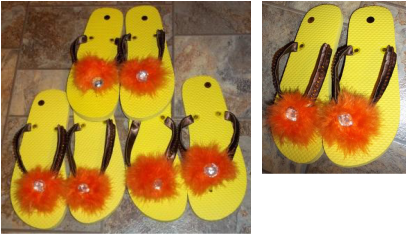
Arielle wanted fun flip flops for her girls to wear at the reception. The flip flops were on sale (yay!) at Michael's. They aren't as nice as the ones from Old Navy and the straps were the kind of plastic that sticks to your feet so we wrapped the straps in a nice satiny ribbon and glued it on with E6000 glue. We glued rhinestones on the straps (kind of hard to see in the pictures!). We got feather boa and cut a 7" piece for each shoe. We basicaly just tied a single knot in the center of the piece and glued the the lose ends to the front of the flip flop. The big crystal embelishment was sewn on using a sturdy needle, pliers and thread. We just sewed through the flip flop strap!
Drink Stirrers
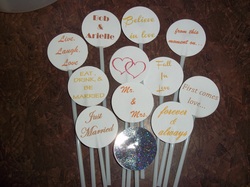
These were so easy! You need stir sticks (we got them at Party City), a 1" circle hole punch, card stock and a printer. We used an avery template for round labels but printed on the card stock. Then we just puched out the sayings we printed, punched an equal number of circles for the backing and glued them on the stir sticks.
Stamped Cocktail Napkins
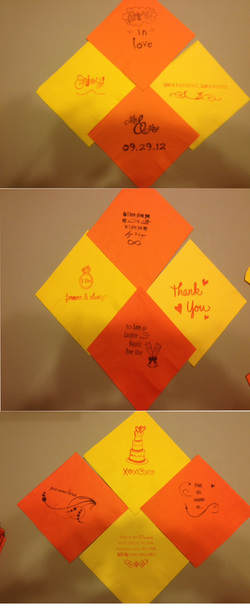
Another simple project - a little time consuming but it was a fun evening with the help of the MOH! We used StazOn Ink pads because they don't run when the nakins get wet. We found stamps on Ebay, and at the craft stores. We had a blast creating unique designs by combining stamps. Advice: Stamp lightly and don't get too much ink on the stamp, depending on the napkins you get the ink may bleed.
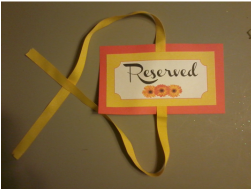
Initials for reception room doors
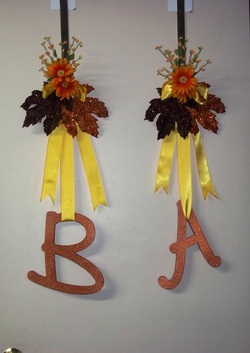
The wooden letters were painted with Krylon Glitter Blast Paint, suspended from satin ribbon, then attached to a small flower arrangement. We used door plain door hamgers but we blinged them with rhinestones!
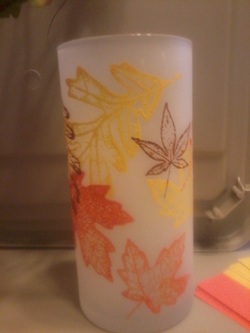
These started out as cylinder vases from the dollar store. We sprayed them with frosted glass paint and stenciled on leaf designs in acrylic paint. Each one held a votive candle and they were used on the table during cocktails hour, with some fall leaf confetti sprinkled around the base.
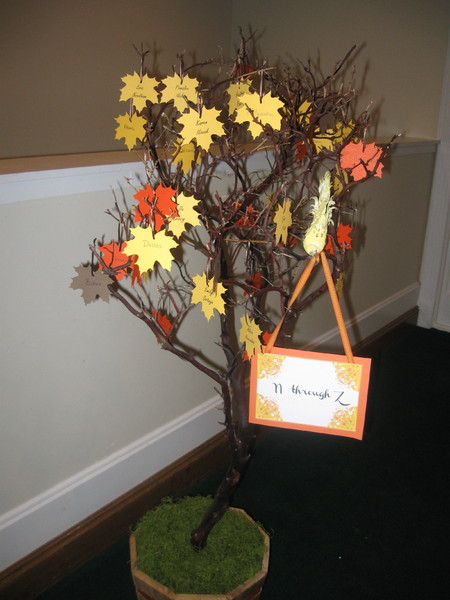
Escort Card Trees
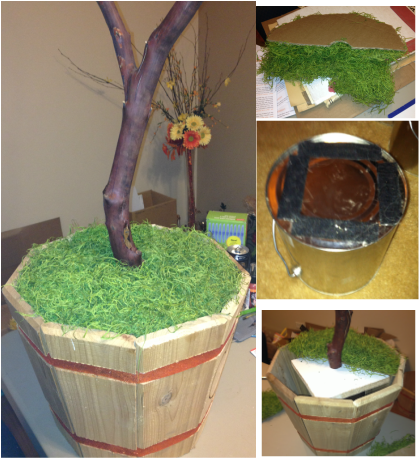
This was one of the more expensive projects because the shipping on the large Manzilla Branches was huge! But this was a project that was a huge part of Arielle's vision so it balanced out!
The branches came with a wooden base but since they would be sitting on the floor we needed to ad a little height. We got pots at Menards and used a wood burner to add hearts and initials. We needed to transport these so they couldn't go in the pots until they were at the venue and once set up they needed to be stable. So Bob filled empty paint cans with cement for weight, sealed them up and put velcro on the cans and the tree bases. (middle picture) We set the cans in the pots and attached the trees. Arielle and I cut cardboard circles with a hole in the center for the tree, cut them in half and used spray glue to attach moss. They turned out so amazing and the day-of-team had no problem assembling them!
The branches came with a wooden base but since they would be sitting on the floor we needed to ad a little height. We got pots at Menards and used a wood burner to add hearts and initials. We needed to transport these so they couldn't go in the pots until they were at the venue and once set up they needed to be stable. So Bob filled empty paint cans with cement for weight, sealed them up and put velcro on the cans and the tree bases. (middle picture) We set the cans in the pots and attached the trees. Arielle and I cut cardboard circles with a hole in the center for the tree, cut them in half and used spray glue to attach moss. They turned out so amazing and the day-of-team had no problem assembling them!
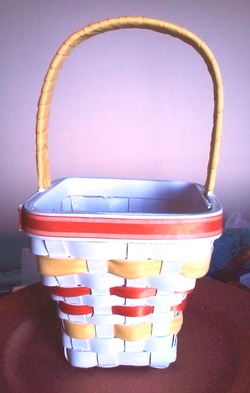
The flower girls basket started life as an Easter Basket (on sale after Easter!) which we painted white . We then wove in ribbon around the basket and wrapped the handle with ribbon. Flowers and bows were added later.
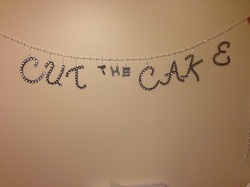
This banner went on the cake table. We bought the larger bling letters but made "the" ourselves using large rhinestones and heavy cardboard for backing as the larger letters looked odd and made the banner too big for the cake table. We strung them on crystal garland and attached them with silver glitter ribbon. We also made banners the same way for the guestbook table, cardbox table and Mr. and Mrs. for the head table.
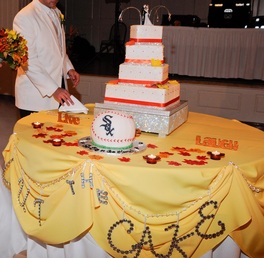
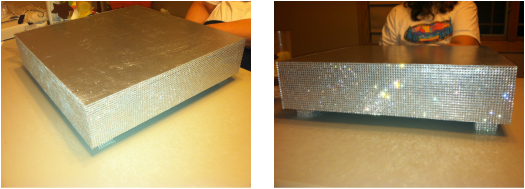
We made this amazing cake stand after seeing the price to buy one. You can't tell in the pictures but it had orange "underglow" lighting. It was a lot of work, requiring some pretty fancy woodworking on the part of the groom but it was worth it! Unfortunately it "disappeared" at the reception...
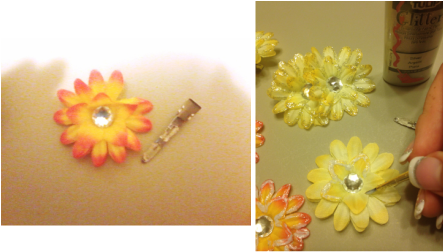
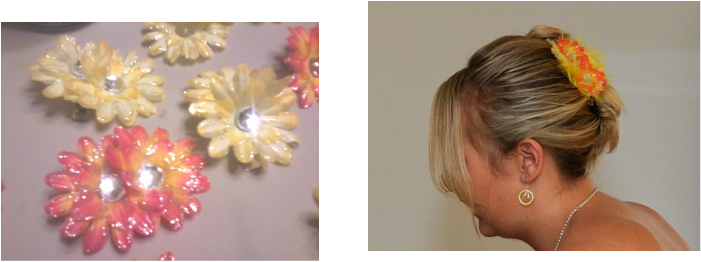
Arielle could not find any facinators or hair clips for the maids that were daisies (in keeping with the theme!) and weren't huge and gaudy. So we ordered daisies with rhinestone centers that were intented for little girls, edged them with Tulip glitter T-shirt paint in clear and attached them to hair clips. We added some yellow feathery stuff (like from a feather boa!) I don't have a picture other than the one of the MOH's hair below...
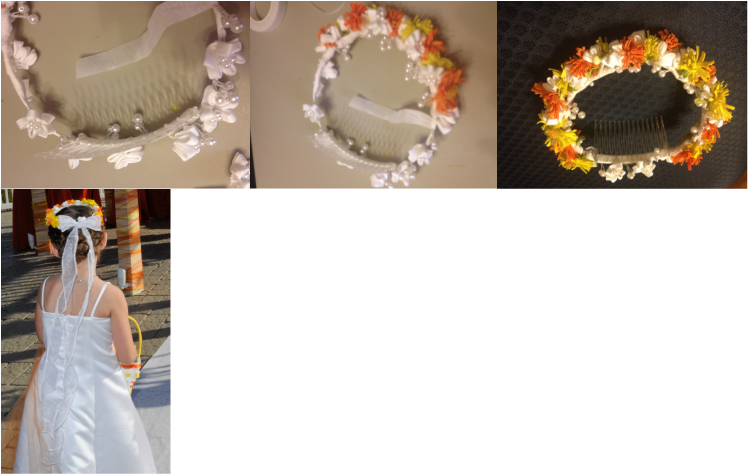
The flowergirl headband started out as a basic wedding headband that we got at Michael's (coupon again!) and we added yellow and orange flowers and a bow made from pearl and rhinestone edged ribbon.
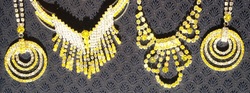
Jewelry for the bridesmaids, flower girl and Moms was anothe thing that proved hard to find, especially in yellow and in the right price range. We looked at painted jewelry on Etsy but it didn't sparkle and Arielle really wanted to stay with her Fall "bling" theme. So we found some decent costume jewelry and painted it using stained glass paint. It allowed the sparkle to still shine through but added the color she wanted.
